This guide is for the moment when a model works on your laptop, but you want it to run inside a small robot. A laptop can easily use big decimal numbers. A microcontroller like the ESP32-S3 has much less memory and power, so we usually shrink the model before putting it into firmware.
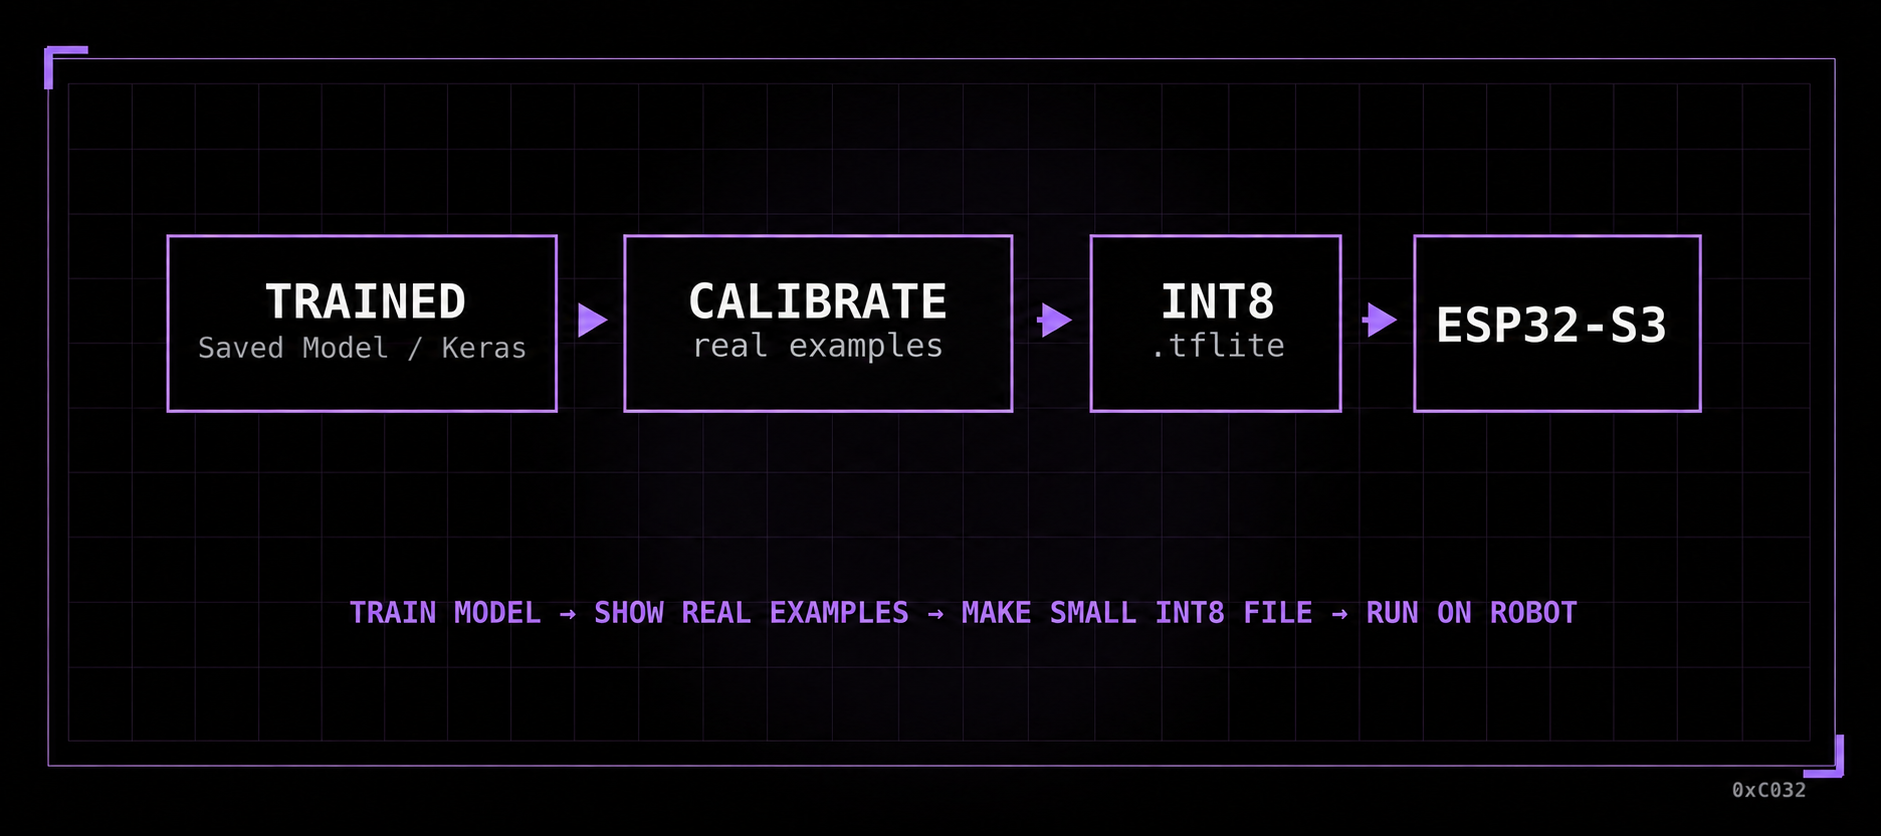
Quantization is the shrinking step. In plain terms, it takes the model's large float32 numbers and turns them into much smaller int8 numbers. The model will not be exactly the same, but it becomes much more practical for a small board.
This tutorial uses a cats-versus-dogs image classifier because the idea is easy to see: the model looks at a small image and predicts one of two classes. We will use the public Dogs vs. Cats dataset on Kaggle, arrange the images into folders, train a small model, convert it to full INT8, check the file, and then load it in an ESP32-S3 project.
1) The Big Idea
A neural network is mostly a pile of numbers. During training, those numbers are usually stored as float32, which means each number takes 32 bits. After quantization, many of those numbers become int8, which means each number takes 8 bits.
The beginner version is this: a quantized model is a smaller, integer-based copy of your trained model. It is made on your laptop, then copied into the ESP32-S3 firmware.
- Download a small example dataset and put it in the folder layout the code expects.
- Train the model on your computer.
- Show the converter real example inputs so it knows the normal number range.
- Create an
int8.tflitefile. - Check that the file is really integer-based.
- Put the file into ESP-IDF and run it with TensorFlow Lite Micro.
2) Set Up the Laptop Environment
The training and conversion steps happen on your laptop, not on the ESP32-S3. The microcontroller only receives the finished model after it has been trained, converted, checked, and turned into a C header.
# Create a clean Python environment.
python -m venv .venv
source .venv/bin/activate

python -m pip install --upgrade pip
pip install tensorflow numpy pillow
Keep all of the Python scripts in one project folder. By the end of the laptop portion, that folder will contain the trained Keras model, the INT8 .tflite file, and the generated model_data.h header for ESP-IDF.
3) Get the Example Dataset and Create the Folders
The training script expects a folder named train with one subfolder per class. For this article, the two classes are cats and dogs. The folder names matter because Keras uses them as the class labels.
project-folder/
  train_model.py
  convert_to_int8.py
  check_int8.py
  make_model_header.py
  raw/
    train/
      cat.0.jpg
      cat.1.jpg
      dog.0.jpg
      dog.1.jpg
  train/
    cats/
      cat.0.jpg
      cat.1.jpg
    dogs/
      dog.0.jpg
      dog.1.jpg
Download the example images from the Kaggle Dogs vs. Cats dataset page. You may need a Kaggle account. After downloading, place dogs-vs-cats.zip in your project folder. The competition archive contains a train.zip file with images named like cat.0.jpg and dog.0.jpg.
# From your project folder:
mkdir -p raw
unzip dogs-vs-cats.zip -d raw_download
unzip raw_download/train.zip -d raw
Now run a small preparation script. It copies the Kaggle images into the exact folder structure the training code expects. To keep the first run manageable, it uses only a limited number of images from each class. Later, you can raise MAX_PER_CLASS or set it to None.
# prepare_kaggle_cats_dogs.py
# Run this after extracting the Kaggle train.zip file.
# It creates:
#   train/cats/
#   train/dogs/

from pathlib import Path
import random
import shutil

RAW_DIR = Path("raw/train")   # contains cat.0.jpg, dog.0.jpg, etc.
OUT_DIR = Path("train")
MAX_PER_CLASS = 1000          # start small; use None for the full set

random.seed(7)

if not RAW_DIR.exists():
    raise SystemExit("Could not find raw/train. Did you unzip train.zip into raw/?")


def copy_class(prefix, output_folder):
    images = sorted(RAW_DIR.glob(f"{prefix}.*.jpg"))
    random.shuffle(images)

    if MAX_PER_CLASS is not None:
        images = images[:MAX_PER_CLASS]

    target = OUT_DIR / output_folder
    target.mkdir(parents=True, exist_ok=True)

    for image_path in images:
        shutil.copy2(image_path, target / image_path.name)

    print(f"copied {len(images)} {prefix} images to {target}")


copy_class("cat", "cats")
copy_class("dog", "dogs")
print("dataset ready")
python prepare_kaggle_cats_dogs.py
When this step is done, check that train/cats and train/dogs both contain images. That check matters. If the folders are empty or named differently, the training script will not find the classes.
4) Train a Small Model First
Start with something small. The ESP32-S3 is powerful for a microcontroller, but it is still not a desktop GPU. The model below is intentionally simple so the full pipeline is easy to follow. It reads the folders from the previous step, resizes every image to 96x96, and learns a binary classifier: cat or dog.
The important beginner detail is the line rescale=1.0 / 255.0. It changes image pixels from the usual 0 to 255 range into a 0.0 to 1.0 range. We must remember that, because the converter and the ESP32-S3 firmware need to use the same kind of input.
# train_model.py
# Run this on your laptop. It trains a tiny cats-vs-dogs image model.
# Folder layout:
#   train/
#     cats/
#     dogs/

import tensorflow as tf
from tensorflow.keras.preprocessing.image import ImageDataGenerator
from tensorflow.keras.models import Sequential
from tensorflow.keras.layers import Conv2D, MaxPooling2D, Flatten, Dense

train_dir = "train"
img_height, img_width = 96, 96
batch_size = 32
epochs = 10   # start small while learning; increase later

# The important beginner detail: training images are scaled to 0.0-1.0.
train_datagen = ImageDataGenerator(
    rescale=1.0 / 255.0,
    validation_split=0.2,
    rotation_range=20,
    width_shift_range=0.2,
    height_shift_range=0.2,
    zoom_range=0.2,
    horizontal_flip=True,
)

train_generator = train_datagen.flow_from_directory(
    train_dir,
    target_size=(img_height, img_width),
    batch_size=batch_size,
    class_mode="binary",
    subset="training",
)

validation_generator = train_datagen.flow_from_directory(
    train_dir,
    target_size=(img_height, img_width),
    batch_size=batch_size,
    class_mode="binary",
    subset="validation",
)

model = Sequential([
    Conv2D(32, (3, 3), activation="relu", input_shape=(img_height, img_width, 3)),
    MaxPooling2D(2, 2),
    Conv2D(64, (3, 3), activation="relu"),
    MaxPooling2D(2, 2),
    Flatten(),
    Dense(128, activation="relu"),
    Dense(1, activation="sigmoid"),
])

model.compile(optimizer="adam", loss="binary_crossentropy", metrics=["accuracy"])
model.fit(train_generator, epochs=epochs, validation_data=validation_generator)
model.save("cats_dogs_model.h5")
print("saved cats_dogs_model.h5")
python train_model.py
At the end of training, you should have a file named cats_dogs_model.h5. That is your normal Keras model. It is useful on the laptop, but it is not the final file for the microcontroller.
5) Convert the Model to Full INT8
After training, you have a laptop model named cats_dogs_model.h5. The ESP32-S3 does not run that file directly. We convert it into a smaller .tflite file.
The most important part is the representative_dataset function. Think of it as showing the converter a few normal examples. If the robot will see real camera images, use real camera-like images for this step. Do not use random numbers unless you are only doing a quick experiment.
# convert_to_int8.py
# Run this on your laptop after training.
# It turns cats_dogs_model.h5 into a fully-int8 .tflite file.

import pathlib
import tensorflow as tf

IMG_DIR = pathlib.Path("train")
IMG_SIZE = (96, 96)
MODEL_IN = "cats_dogs_model.h5"
MODEL_OUT = "cats_dogs_model_int8.tflite"

# These examples teach the converter the normal range of your inputs.
# Use real images, not random noise, when you can.
def representative_dataset():
    ds = tf.keras.preprocessing.image_dataset_from_directory(
        IMG_DIR,
        labels=None,
        image_size=IMG_SIZE,
        batch_size=1,
        shuffle=True,
    )

    for img in ds.take(200):
        # Must match training: ImageDataGenerator used rescale=1/255.
        img = tf.cast(img, tf.float32) / 255.0
        yield [img]

model = tf.keras.models.load_model(MODEL_IN)

converter = tf.lite.TFLiteConverter.from_keras_model(model)
converter.optimizations = [tf.lite.Optimize.DEFAULT]
converter.representative_dataset = representative_dataset

# Beginner translation: do not quietly leave float layers inside the model.
# If a layer cannot become int8, we want conversion to fail so we can fix it.
converter.target_spec.supported_ops = [tf.lite.OpsSet.TFLITE_BUILTINS_INT8]
converter.inference_input_type = tf.int8
converter.inference_output_type = tf.int8

tflite_model = converter.convert()
open(MODEL_OUT, "wb").write(tflite_model)
print(f"saved {MODEL_OUT} ({len(tflite_model)} bytes)")
python convert_to_int8.py
The line converter.target_spec.supported_ops = [tf.lite.OpsSet.TFLITE_BUILTINS_INT8] is a safety lock. It tells TensorFlow: if the model cannot be fully converted to integer operations, stop and report the problem instead of silently leaving float operations inside.
6) Check the File Before Flashing
Before debugging firmware, check the model on your laptop. This is much easier than flashing the board over and over. The script below prints the model input type, output type, input shape, and quantization numbers.
# check_int8.py
# Run this on your laptop before touching the ESP32-S3.

import numpy as np
import tensorflow as tf

MODEL = "cats_dogs_model_int8.tflite"

interpreter = tf.lite.Interpreter(model_path=MODEL)
interpreter.allocate_tensors()

input_info = interpreter.get_input_details()[0]
output_info = interpreter.get_output_details()[0]

print("input dtype :", input_info["dtype"])
print("output dtype:", output_info["dtype"])
print("input shape :", input_info["shape"])
print("input scale, zero:", input_info["quantization"])
print("output scale, zero:", output_info["quantization"])

float_tensors = []
for tensor in interpreter.get_tensor_details():
    if tensor["dtype"] == np.float32:
        float_tensors.append(tensor["name"])

if float_tensors:
    print("float tensors still present:")
    for name in float_tensors:
        print(" -", name)
else:
    print("no float32 tensors found")
python check_int8.py
For this beginner flow, you want to see int8 for the input and output. If the checker says there are still float32 tensors, the model may not be fully integer-friendly yet.
7) Turn the TFLite File Into a Header
Firmware needs the model bytes. One beginner-friendly method is to turn the .tflite file into a C++ header called model_data.h. Then the ESP32-S3 code can include it like a normal source file.
# make_model_header.py
# Converts the .tflite file into a C++ header the ESP32-S3 can compile.
# Put the output file in your ESP-IDF project's main/ folder.

from pathlib import Path

model_path = Path("cats_dogs_model_int8.tflite")
out_path = Path("main/model_data.h")
data = model_path.read_bytes()

out_path.parent.mkdir(parents=True, exist_ok=True)

with out_path.open("w") as f:
    f.write("#ifndef MODEL_DATA_H\n")
    f.write("#define MODEL_DATA_H\n\n")
    f.write("#include <cstdint>\n\n")
    f.write("alignas(16) const unsigned char model_data[] = {\n")

    for i, byte in enumerate(data):
        f.write(f"0x{byte:02x},")
        if (i + 1) % 12 == 0:
            f.write("\n")

    f.write("\n};\n")
    f.write(f"const unsigned int model_data_len = {len(data)};\n\n")
    f.write("#endif  // MODEL_DATA_H\n")

print(f"wrote {out_path} ({len(data)} bytes)")
python make_model_header.py
After this script runs, your ESP-IDF project should contain main/model_data.h. That header is just the .tflite file expressed as C bytes.
8) Create the ESP-IDF Project
Now move to the ESP32-S3 side. Espressif provides an esp-tflite-micro component for using TensorFlow Lite Micro in ESP-IDF projects. Create the project, set the target to esp32s3, and add the component.
# From an ESP-IDF terminal:
idf.py create-project sl_tflm_int8_test
cd sl_tflm_int8_test
idf.py set-target esp32s3
idf.py add-dependency "espressif/esp-tflite-micro^1.3.7"

# Copy or generate model_data.h into the main/ folder.
# Then build and flash:
idf.py build
idf.py --port /dev/ttyUSB0 flash monitor
The main/CMakeLists.txt file can stay very small for this header-based example.
# main/CMakeLists.txt
idf_component_register(SRCS "main.cc" INCLUDE_DIRS ".")
9) Run a Smoke Test on the ESP32-S3
A smoke test is the first simple run. It does not use the camera yet. It only proves that the model loads, the tensor arena allocates, inference runs, and the ESP32-S3 prints an output.
// main/main.cc
// Minimal ESP32-S3 TensorFlow Lite Micro smoke test.
// It loads model_data.h, fills the input with a neutral value, runs inference,
// and prints the output. Replace the neutral input with real camera data later.

#include <algorithm>
#include <cmath>
#include <cstdint>

#include "esp_heap_caps.h"
#include "esp_log.h"

#include "tensorflow/lite/micro/all_ops_resolver.h"
#include "tensorflow/lite/micro/micro_interpreter.h"
#include "tensorflow/lite/schema/schema_generated.h"

#include "model_data.h"

static const char *TAG = "sl_tflm";

static int8_t quantize_0_to_1(float value, float scale, int zero_point) {
  value = std::max(0.0f, std::min(1.0f, value));
  int q = static_cast<int>(std::lround(value / scale) + zero_point);
  q = std::max(-128, std::min(127, q));
  return static_cast<int8_t>(q);
}

extern "C" void app_main(void) {
  ESP_LOGI(TAG, "model size: %u bytes", model_data_len);

  const tflite::Model *model = tflite::GetModel(model_data);
  if (model->version() != TFLITE_SCHEMA_VERSION) {
    ESP_LOGE(TAG, "model schema %d does not match runtime schema %d",
             model->version(), TFLITE_SCHEMA_VERSION);
    return;
  }

  // AllOpsResolver is beginner-friendly. Later, replace it with
  // MicroMutableOpResolver and only add the ops your model uses.
  tflite::AllOpsResolver resolver;

  constexpr size_t kTensorArenaSize = 512 * 1024;
  uint8_t *tensor_arena = static_cast<uint8_t *>(
      heap_caps_malloc(kTensorArenaSize, MALLOC_CAP_SPIRAM | MALLOC_CAP_8BIT));

  if (tensor_arena == nullptr) {
    ESP_LOGW(TAG, "PSRAM allocation failed; trying internal RAM");
    tensor_arena = static_cast<uint8_t *>(
        heap_caps_malloc(kTensorArenaSize, MALLOC_CAP_INTERNAL | MALLOC_CAP_8BIT));
  }

  if (tensor_arena == nullptr) {
    ESP_LOGE(TAG, "could not allocate tensor arena");
    return;
  }

  tflite::MicroInterpreter interpreter(model, resolver, tensor_arena, kTensorArenaSize);

  if (interpreter.AllocateTensors() != kTfLiteOk) {
    ESP_LOGE(TAG, "AllocateTensors failed; try a larger tensor arena or a smaller model");
    return;
  }

  ESP_LOGI(TAG, "arena used: %u bytes",
           static_cast<unsigned>(interpreter.arena_used_bytes()));

  TfLiteTensor *input = interpreter.input(0);
  if (input->type != kTfLiteInt8) {
    ESP_LOGE(TAG, "expected int8 input tensor");
    return;
  }

  ESP_LOGI(TAG, "input bytes=%u scale=%f zero_point=%d",
           static_cast<unsigned>(input->bytes),
           static_cast<double>(input->params.scale),
           input->params.zero_point);

  // First smoke test: feed a middle-gray image.
  // Later replace 0.5f with each camera pixel divided by 255.0.
  for (size_t i = 0; i < input->bytes; ++i) {
    input->data.int8[i] = quantize_0_to_1(
        0.5f, input->params.scale, input->params.zero_point);
  }

  if (interpreter.Invoke() != kTfLiteOk) {
    ESP_LOGE(TAG, "Invoke failed");
    return;
  }

  TfLiteTensor *output = interpreter.output(0);
  if (output->type != kTfLiteInt8) {
    ESP_LOGE(TAG, "expected int8 output tensor");
    return;
  }

  for (size_t i = 0; i < output->bytes; ++i) {
    int q = output->data.int8[i];
    float real_score = (q - output->params.zero_point) * output->params.scale;
    ESP_LOGI(TAG, "output[%u] raw=%d score=%f",
             static_cast<unsigned>(i), q, static_cast<double>(real_score));
  }
}
10) Replace the Fake Input With Real Sensor Data
The smoke test fills the model input with 0.5, which is like a plain middle-gray image. That is only for testing. After the model runs, replace that loop with real camera pixels.
The rule is simple: the ESP32-S3 must feed the model the same kind of numbers that the Python training code used. In this article, training used pixel / 255.0, so firmware should also think in that range before converting values into int8.
- Resize the camera image to
96x96if the model was trained on96x96. - Keep RGB if the model was trained on RGB. Do not switch to grayscale unless you retrain.
- Convert each pixel into the same real range used in training.
- Use the input tensor's
scaleandzero_pointto turn that real value intoint8. - Run
interpreter.Invoke()and turn the result into robot behavior.
11) Make It Smaller Later
The ESP32-S3 code above uses AllOpsResolver because it is easier for beginners. It includes many TensorFlow Lite Micro operations. Once the model works, you can replace it with a smaller resolver that only includes the operations your model actually uses.
// Optional later optimization: replace AllOpsResolver with only the ops you need.
// Example for a small CNN. Your exact list may be different.
#include "tensorflow/lite/micro/micro_mutable_op_resolver.h"

tflite::MicroMutableOpResolver<6> resolver;
resolver.AddConv2D();
resolver.AddMaxPool2D();
resolver.AddFullyConnected();
resolver.AddReshape();
resolver.AddLogistic();
resolver.AddQuantize();
12) Common Beginner Mistakes
- Downloading the Kaggle dataset but not copying it into
train/catsandtrain/dogs. - Using random calibration data and then wondering why real camera images behave badly.
- Training with
pixel / 255.0but feeding raw0to255pixels in firmware. - Changing image size or color format between training and deployment.
- Assuming a model is fully int8 without checking it.
- Making the model too large, then trying to solve the problem only by increasing the tensor arena.
Quantization is not magic. It is a translation step. You are translating a model from laptop math into microcontroller math. When that translation is done carefully, the robot can make small local decisions without sending everything to a server. That is the point: local behavior, repairable firmware, and autonomy that fits inside the machine.